Upload files to Amazon S3 with Bitrise in a few steps


Can we upload our APKs to AWS S3? Sometimes some files need to be uploaded to S3 rather than Bitrise, which has a default step for public download and access.
For those who don’t know what the AWS S3 is, check it out here first, then go back and complete this post.
In this article, I will explain how to upload files (in my case APKs) to Amazon S3 and retrieve the external URL of these files using Bitrise. Later, you can share these links (with public URLs) in other steps, such as posting them on a Slack channel so that teammates can access them with the click of a button.
💁 Where to start
Before we start, of course, first, we need access to Bitrise and AWS Console. Then, after creating those accounts:
- Create a Bitrise project for Android if you haven’t already. By default, it creates
primaryanddefaultworkflows with simple Android steps. - Create a S3 Bucket and get access keys to use later.
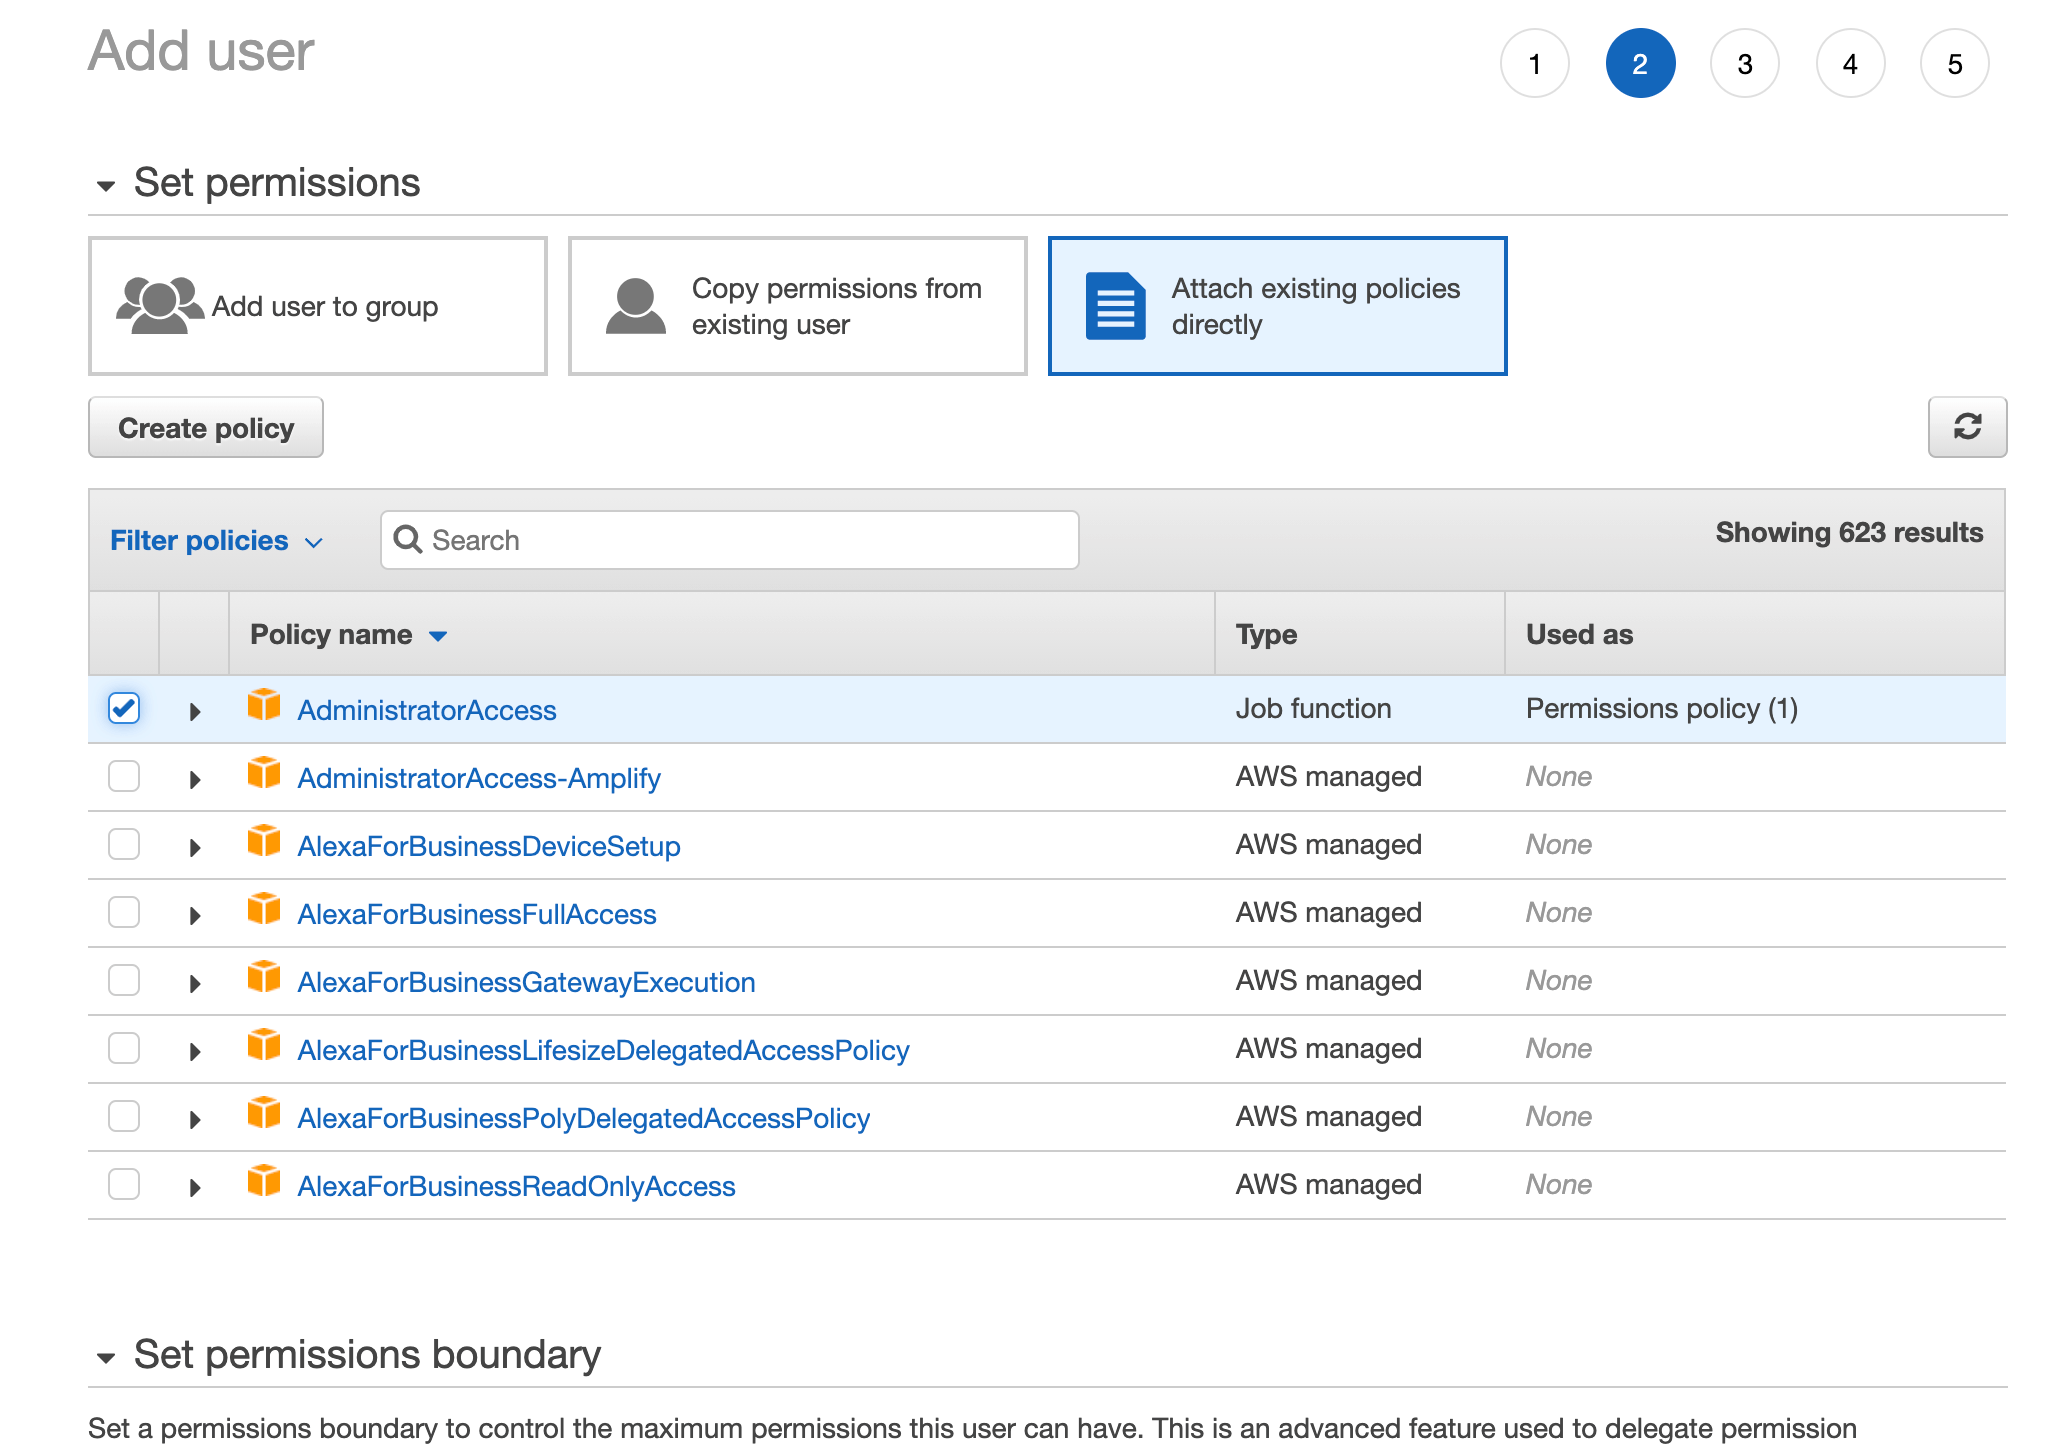
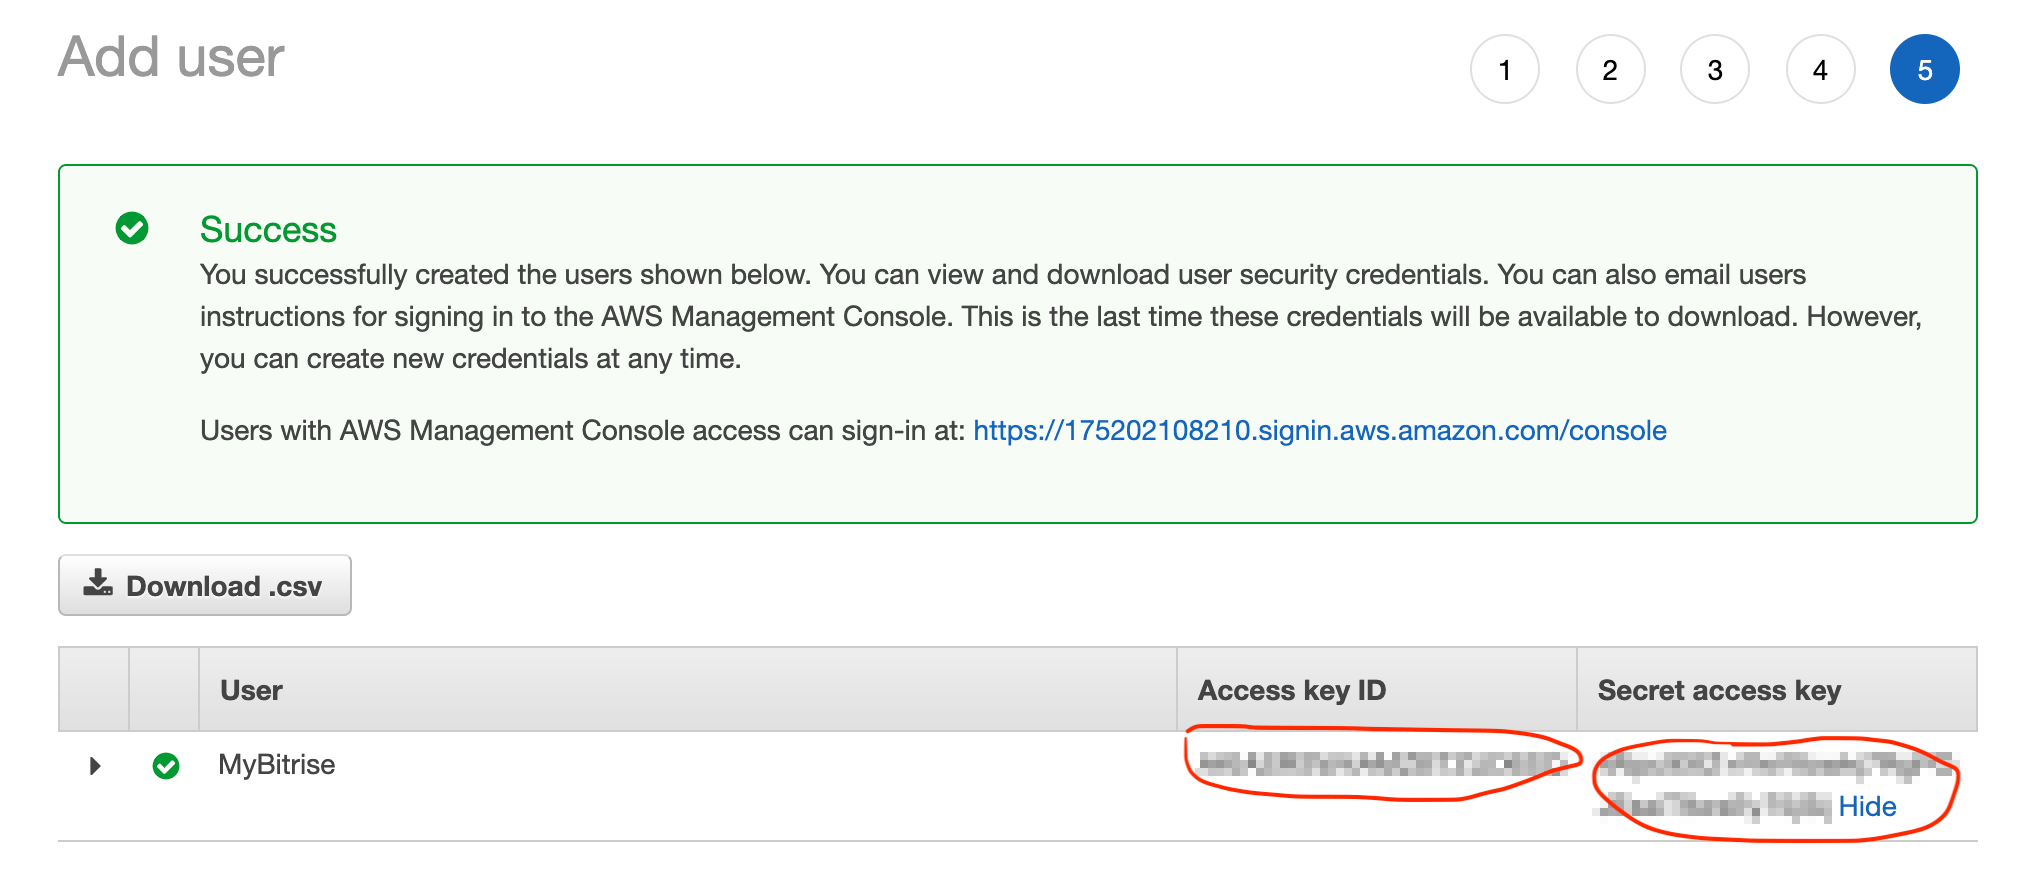
Create a S3 Bucket on your account here and leave all settings as default. After creating the bucket, the next step is to allow access to that bucket by creating an account, specifically for Bitrises. Follow the instructions on Amazon to create a new account and save the keys at the end for later use. Check the screenshots below to double-check that you have set the required permissions.

🪚 Creating the Bitrise step
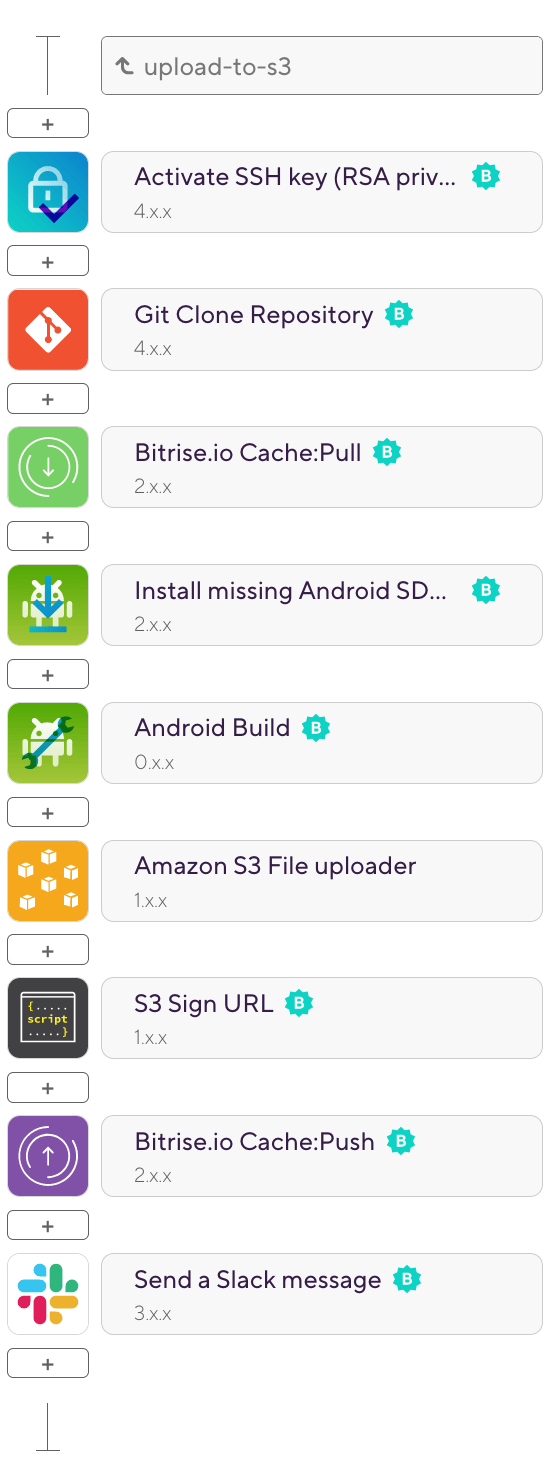
Once the Android project is successfully created, you need to create an empty workflow that looks like the screenshot below. Find the Amazon S3 file uploader step on the marketplace. There you can search for any other Bitrise steps too.
- Store the keys you saved from Amazon to the Secrets Tab as two separate variables
$AWS_ACCESS_KEY_IDand$AWS_ACCESS_SECRET_KEY. - A few parameters need to be specified in the Amazon S3 file upload step. You will see that some fields are marked red and should be filled in.
- File path - use the variable generated by the Android Build step,
$BITRISE_APK_PATH - Amazon AWS Access Key - the access key that you saved earlier,
$AWS_ACCESS_KEY_ID - Amazon AWS Secret Access Key - the secret access key that you saved earlier,
$AWS_ACCESS_SECRET_KEY - Amazon S3 Bucket Name - the bucket name, in our case
bitrise-s3-bucket
- Make public access to the uploaded file.
You can easily copy this script below as a custom step to sign an already successfully uploaded file on S3 and save the URL to a Bitrise variable. As mentioned, the link can later be used for sharing in a Slack message, for example.
In this way, Bitrise saves this value under
$APP_S3_SIGNED_URLvariable which can be used in later steps.
envman add --key APP_S3_SIGNED_URL --value "$S3_LOCAL_VAR"
🧐 Check if it works
You can manually run the newly created step directly from Bitrise by navigating to Builds tab, clicking Start / Schedule a Build and typing the branch name.
👏 Conclusion
You have now created your own Bitrise workflow. Bitrise is a tool that already has many predefined steps created by many developers around the world. If you create your own step, for example, you can share it with all of us by following these steps.
Let me know if you find this helpful or need more information. I would be happy to give you a hand.
Cheers! 🍻